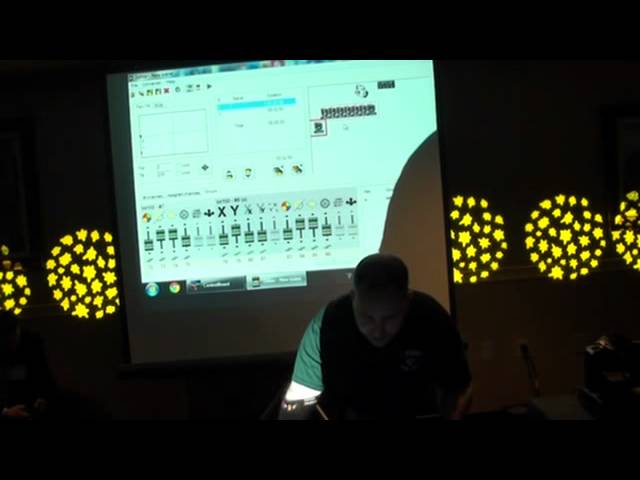
 47:55
Chauvet Show Xpress DMX Demonstration mblv16
Contents of the video
0:00 I guess we can go ahead and hand it off to Alan
They just arrived and they will be in stores in another two weeks or so. So I guess we can go ahead and hand it off to Alan. Alan is one of our key product planners, product developers. So he is the main guy that knows the most about this stuff. So if at the end of the seminar you guys still have questions, we've got to get out by 3. Please come down to the booth. Alan will be there and some of our other guys will be there as well. Feel free to ask any questions you can get. This is a packed house and I love it. So thank you all for coming. SX Education 101, we are going to be discussing the three main windows of Show Express software. Can you hear this very soft, gentle voice back there? Good? Is he loud enough? Can you hear him? A little louder. Pretend like I'm talking to my dogs.
Verse 3. We have the setup window, the editor window, or the builder window, and we have the playback window which is called live. Before we touch on those three windows, I'm going to go over with you the interface. The software is free. You can go online, you can come to these seminars and get the software. The software is 100% free, always has been and always will be. The software also, whenever we come out with an update, is also free for you. You pay for the interface, and the interface is the link between the software, i.e. your computer, and your DMX lights, whatever light it may be. This in my hands is the Express 512. This is the middle-of-the-line product, and maybe I left it under the table. On the floor is the Express 100 cable, and this is the entry-level product, and this is a USB...
To XLR or DMX cable, this is your little dongle. This has a limitation of 100 DMX channels or 8 fixtures, whichever comes first. So if you have 8 up lights around the room and you want to control them all individually, you can do that with this because this will hold up to 8 different fixtures. If each one of those fixtures is say 12 channels, 15 channels and you exceed 100 DMX channels, this will not work for you. This will also only work for PC. So if you have a Mac, you can automatically cross this off your list. This next one up, which I just had in my hands, is the Express 512. This one will work on both PC and Mac, and there are no limitations with this product. This is the middle. There's a Plus version as well, which you can come to the booth and see. We have it running. We are also using it on the main stage. This box will control up to 512 DMX channels with no limitations whatsoever. It will also store one scene that you choose, and you can upload it into the box.
Remove the computer and this will automatically play back that scene in a loop. Costs? You want to go over costs here? Okay, let's go over costs afterwards if you don't mind. What is that called? Express 512. Now, the step up from this is the Express 512 Plus. It's a little bit larger of a box. And the difference is there is you can, instead of storing one scene and removing the computer, you can store up to 18 scenes and then you can remove the computer. You can also control all those scenes, which I guess they're remote, probably under the table again. You can also control those scenes wirelessly and trigger them with a wireless remote sold separately. So what does that mean for you? You guys can program your lights in your shop, in your garage, wherever it is you program your lights, upload all of those scenes, up to 18 of them, into your box.
4:22 Alan, is the remote good with both the 512 and the Plus?
And send that box out with your rig and that wireless controller. All your DJ has to do is plug up all the lights, click the button on the remote, and bam, your lights go based on what you programmed into it. All included with the software, thank you. This is the remote, 18 buttons, speed control on the bottom. It's literally that simple. You push 1, scene number 1 plays. You push 3, scene numbers 1 and 3 play, or depending on how you have it set up in your software. So it can be very basic or very advanced depending on what you're trying to do with the software. We good with the interfaces? Once again, the software is free. You can get it online. You pay for the interface which is the link USB out DMX to your fixtures. Alan, is the remote good with both the 512 and the Plus? The remote will only work with the Plus. And that is the main difference between the two. The range of the remote there, Alan? About 20 feet. It's standard IR. About the same as your TV at home. We good? Software time? Yes. Yeah!
How does it work? So, let me show you what I clicked on first. When you install the software, you get the control board. This is where everything is accessed. So, you must start this. The icon is this computer screen here at the bottom and out comes this. On the screen itself, it gives you the name of the show which I'll go over in a minute. The number of universes that the computer found, because I have one plugged in right now, and then the name of that interface. Express 512, Express 512+, or Express 100, depending on which interface you connected. For those rigs that are going out that need more than one universe, you can take multiple interfaces, connect them to the same computer via separate USB ports or a hub, and it will see two universes found. Express 512, Express 512+, whatever you have connected.
Going through a hub, does that create any sort of delay? No. To the lights? No. No delay. Okay, so this is the main window. This is what you're going to see when you start the software. Once again, on the bottom, this is where we're going to start. This is the setup window. This is the editor, where you actually do all of your programming. This is where you're going to spend most of your time. Skip this for now. And this is your playback. This is live. This is where you're going to play back all of your scenes from. And for those of you that have that app, the live underscore mobile, This is what it works with. You cannot use that app to program your lights. You use that app to play it back, and we're going to go over that later on. This is our 3D visualizer, so if you want to program your lights, set up your truss, move your fixtures around, put people, put pianos, whatever you want to do in your area, maybe even put a dance floor, this is going to be the icon for you. If you want to run the software on a netbook, I do not recommend you click this button. If you're going to use it on almost any other PC, this button is A-OK.
The software is not resource hungry, it does not require a lot of memory or RAM or anything to use it. Let's get started. Setup window. This is where you set up the software. You tell the software what fixtures you have and what make and model. This is not necessarily what's going to be in your show. In other words, you have four Cuespot 260s. Right here, this doesn't matter. All you need to tell the software is you have a Cuespot 260. Same thing for all of your park hands. We have, let's say, the Freedom part here. We're going to tell the software we have a Freedom part. Doesn't mean we need to put 16 of them in just yet. That's the next step. Let's do it together, okay? Up here on the top you can import a fixture. I'm going to back out one and you can see here there's a list of a ton of different manufacturers of lights. We give you all the profiles that we could possibly give you and unfortunately we don't have them all.
And I'm sure someone in here is going to find that one that we don't have. In that situation, you give Cheve a call, you tell us what product you have and we will make the profile and send it to you. So, Cheve, we're going to pick on, let's say we have the Intimeter Spot 150s here next to me. So I'm going to find the actual product, Intimeter Spot LED 150. Now, you see two of them here, 6 channel mode and 11 channel mode. You need to know how you're going to run your show. Are you going to put this fixture in the basic mode, which is six channels, or are you going to put this fixture in the advanced mode, which is 11 channels? The differences can be found in each individual product manual. For this seminar, we're going to do the advanced mode because I want full control of the fixture. Next, I'm going to import the Cuespot 260 LED, advanced mode. Next, I'm going to import the Freedom Park in three-channel mode. You all with me so far?
9:28 The 3D visualizer here, these are all of the settings for that 3D view
Sorry? G-spot, 260, LED. It does not matter which order you put it in. All you're doing right now is telling the software what make and model you have. We good so far? Great. Now that we have that set, let's go over the other parts of this window. If you want to just end there, you are more than welcome to just end there and the software will totally work. But I want to explain to you what else the software can do. When you select the individual product here, I'm going to select the 150. The 3D visualizer here, these are all of the settings for that 3D view. So if you're not going to use a 3D visualizer, pay no attention to this whatsoever. This is the channel section of the selected fixture. So I have the Intimidate Spot 150 LED which is right here and this tells me what each of the 11 channels do. If you click on that channel, this now tells you all of the values of that channel. The values are 0-255 for each channel so you have 0-255
0 to 255, 255 and so on and so forth. So now if I select on the Gobo channel, for example, you can see we can import custom images of the Gobos. It gives you the values of each. So it can be very detailed if you wish. You do not have to go into all this detail. All this detail should be done already for you from us. This will come into play when programming. I'll show you how. You with me so far? Yep. Alright, we're going to move on to the next tab. So we kind of put it in order for you to try to keep you from getting confused. Setup window, the fixture setting right here. Next step is DMX addressing. This is where you tell the software how many of which one you have. So I'm going to do the intimidor spots first and then I'm going to do the freedom pars and then I'm going to do the cue spots that we have over there on the wall that were shooting custom gogos as you walked in if you saw it. So you have a few ways of telling the software what you have.
11:32 For 1 through 4, you would probably leave those unchecked
You can either click, click and drag. You can simply double-click. This is what you're telling the software you have. Intimator spot 150. The DMX starting address automatically is going to be 1. We're going to give it a name. We're going to call it Int 150 number 1. You can reverse the pan. You can also reverse the tilt. Perfect example. You can have these guys on one side of your stage and these on another side of the stage. So instead of the lights doing this... When you move the pan, the lights will do this. So for 1 through 4, you would probably leave those unchecked. For 5 through 8, you can check it. Then the lights will mirror each other. That's what the reverse pan and reverse tilt will do. If you have a fixture that does not have a digital display on it, who doesn't know what a digital display is? Sweet. If you have a fixture that does not have a digital display, we give you the dip switch settings for that fixture. So if you have to address a fixture at 452,
You don't have to sit there and think in binary which switch to turn on. That sucks. We do all the work for you. There's plenty of apps for that, yes. Also, there's an app on our website you can get too. But we do all the hard work for you right here. So once we have it set, I'm going to click save. Now what I've done is told the software DMX starting address 1, that fixture, the model, the number in 3D view if any of the channels are reversed or not. Now I need to tell the software I have 8 of them because they're right here in front of me. So, you have a choice. You can either click each one, do it eight times, which would suck, or you can right-click the fixture and go to duplicate, and you're going to tell the software how many to duplicate. So, since I already have one in there, I need a total of eight, I'm going to add seven. Hit enter, done. All eight are now in there. Not only are they in there, but they're automatically addressed for you in 11-channel mode.
Walk to the first fixture, set that one to DMX starting address of 1. Walk to the second fixture, set the starting address to 12 and you just keep going down the line. So all of the mathematics Show Express does for you. Any questions with that? If you need to delete something, right click, delete. Just back for a moment ago when you talked about the reverse pan. I have four of the Intimidator XYZ triple axes. I love them to death but my lighting guy is having a hell of a time. If I can have everybody hold off on questions until the end, that way we won't run out of time. Or come to the booth if we run out of time. We good so far with this? Good stuff. We're going to go to the next one and we are going to now add in the freedom bar. Simply double click, we're going to name it F-par, number 1, click save. Now we're going to add in the two cue spots over there. Double click, cue 260, number 1, save. You can either double click it again or duplicate it one time. Your choice. You now have every single fixture in this room set up for this.
And you would do the same thing for your rig. Doesn't matter if it's Cheve, Alation, Martin, doesn't matter. The functionality is 100% the same as what we just went over. So you'll do this for all of the fixtures you have in your universe. Obviously not more than 512 channels can be used. And this window is now officially done. If you are using two universes, you have a universe control up here on the top. Universe 1 and universe 2. It goes all the way up to 6. So you can plug in six interfaces. To the same computer with a USB hub if you want, and you have a ton of control. Right now we're on Universe One. Next is the fun part, the programming. This is where most of your time is going to be spent, is programming the light scenes, making the show look the way you want it to look. Show Express has a few shortcuts to make it hopefully a little bit easier for you, and we're going to go over those right now. To select your fixture, you can either select it down here,
16:09 You can also change the image of the product
It puts a red bar around it, or you can come up here to the 2D window and you can select it that way. You can also use your keyboard shortcuts. Control-A selects all of those fixtures of that type. So whatever you do to one, it does to another. Spot 150, moving head all the way on the end is moving the tilt. If I press Control-A, now all the heads move their tilt. So there's no limit when this comes up. If you have 352 moving heads, they will all do the same thing because I've selected them all. You can also change the image of the product. So now you have the actual product image in there so you know what you're clicking on. You can rearrange these any way you want. You can even change the background image instead of it being white. You can take a picture of your setup. Click!
Put it right there, you can move those lights around to your setup so that you know what light you're clicking when you're programming. You'll right click, change background. Very user-friendly and easy to use to make it simple for you. You can do the same thing with the cue spots. If you want, you can just change the product image. And then also for the freedom part, you can follow the same steps. Selecting your products and grouping your products, that's pretty much what's going to save you the most amount of time. You don't want to sit there and move every single fader for each and every one of your products separately because that sucks. There's a lot of channels, so to do that you're going to use groups. Grouping a product is a little bit more customizable where we have built-in groups where you can select evens, select odds, so it'll select fixtures number 2, 4, 6 or 8 or 1, 3, 5 and 7 depending on where they are.
Or you can customize your own group and you can make them, maybe some of them in the group are the 150s, some are the 260s, it's your choice. To make your own group, you will simply select the fixtures that you want by either pressing control A on the keyboard or command A for the Mac users. You can hold the control key and select specific numbers, whichever ones you want. After you've done that, you'll go down to the group name and add a new group. You'll give it a group name, we'll just call it Seminar 1. You give it a letter on the keyboard, it could either be a lowercase or a capital letter, and click apply. Now, whenever you press A on the keyboard, it selects those fixtures that you just told it to. You can have up to 52 different groups, and that's a combination of lowercase and capital letters. So G and capital G are two different groups.
Really quickly program your lights. If you remember from the previous window, I showed you all of the colors and all of the values for each one. This is where that's going to come in. X and Y are your pan and tilt. Your color wheel is here. You can... I don't think I have the resolution here. Okay, I do. Due to the resolution of the projector, it's not really where it should be, but you can still access it here. So what you'll do in the full resolution windows, you'll have this and then you'll have another box on top of it. You can click on the box below and this will pop up. So, instead of moving your fader and find, okay, yellow, red, green, blue, oh, okay, I want pink. You just simply click the square on the color and click on light red. Bam, your lights are going to go light red. Let's actually do it so you can see what I'm talking about. So what I'm going to do here is erase what I've done, created a new scene. We will bring up the dimmer and the shutter and I'm going to move the pan and tilt to the ceiling.
19:52 This is your home button
Just so that everybody can see. This is your home button. This will set the pan and tilt to 127 and 127, which would be straight up or straight down, depending on how you have your fixtures set up. You can access the pan and tilt functions here underneath this tab, and you can use your mouse and you can make your mouse a follow spot, which is really kind of nice. Brides and grooms walking down the aisle, simply follow them with your mouse. So let's say I'm going to put it on the wall here. Raglan could be our groom. So, you have now the tilt set. You know where it's going to be. You want to now follow them down the aisle. What you can do is using the software is you can lock the tilt. So we'll lock the tilt. Now when I click here, the light will not tilt. It will only pan which keeps your light on point at all times until they're gone then you can move it away. So you have pan and tilt locking separately.
Thank you, Mr. Groom. If you are controlling a park can, an LED park can, and you click on, obviously it doesn't have pin and tilt, it is RGB control. You can easily select your colors right from this palette simply by moving your mouse. For those of you that don't know how to color mix or don't want to color mix, the Show Express software does all of the hard work for you. Because I have them all addressed the same right now, they're all going to be the same color. If you want a red, you can just come over here and click red. You can also come in here and just manipulate them if you want to. I also just want to point out your FreedomPars are 100% wireless. Cool. All right. Are you on a Wi-Fi network then? I am on a DeFi 2.4 gigahertz transmitter that we also sell. So what's the question? Let me show you the setup that I have. From the computer, I'm going USB out into the interface.
Out of this interface, I'm going into my DataStream 4 which is an opto-isolator, a DMX splitter. You never want to just make your own Y cables, it's not gonna work. So you wanna use the splitter. Into the splitter, then you have four outputs, optically isolated for each one. Then you also have a through port to connect it to another DataStream 4 if you want. In an emergency, you can plug a light in there through the through port if you wanted to use it as well, it's fine. It's just not isolated. From the two outputs, I have one going to this table And one going to this table. So it's coming through this fixture, going all the way down the line. It's then going into the DeFi 2.4, which is transmitting to all of the freedom cores around the room. Anybody see something really unique about that? A lot of guys will set up their transmitters next to their controller. So right out of their controller they go wireless. You don't have to do that. Just in this situation. I've gone through four fixtures and an opto-isolator, and now I'm first going into the DeFi, and that's transmitting it up.
23:39 I'm going to get into some now a little bit more advanced stuff
It's everything. On top of that, I'm going out of the transmitter to the Cuespot 260s over there. So it's a very versatile unit. I know product plug, DeFi 2.4. Gotta get one. 600 feet. Range on that is 600 feet. And we are running a special downstairs. I believe if you buy four Freedoms, correctly from Ron Carl, you get a DeFi for free. So head on downstairs. And that's not at our booth, that's at our dealers, which is Capri 112. All right, we good so far with this window? I'm going to get into some now a little bit more advanced stuff. For example like a moving head. You want to have the moving head over here and you want to move it over here. How do you do that? So let's start a new look and let's actually move the moving heads around and do stuff. So I selected my moving heads. Turn on the shutter and dimmer and I'm going to hopefully not blind you all. Close your eyes. We'll put them here on the back wall and we will make it.
Hello, the gobos, pick a gobo, gobo 6. And now this is the first look that we want, just as an example. Now you want the heads to say to rotate and move to the ceiling. What do you do? You don't have to say this yet. You can if you want to. If you're on a desktop and power goes out, yeah, I would say it. If you're on a laptop, you're okay. That's what we're doing. Next, we're going to add a step. Right now, this is step one. Light yellow. In that breakup pattern, that's step one, five seconds. We're going to add a step right now. Now we're on step two, which automatically copies the previous step and pastes it next. Now you're going to manipulate step two to the next step. So we're going to put them right on the ceiling. And we'll change the color. Say red, change the gobo, nice little gobo shake going on. Okay, let's say that's what we like. You can either save this as a scene
The scene will be a total of 10 seconds, 5 seconds per. So it's going to go 5 seconds, it's going to wait, then it's going to go here and then wait, and then it's going to go back to here and start all over again. It's going to continuously loop. Okay, the total scene time from start to end is 10 seconds. If you want to change that time, you can easily do so by either coming up here, selecting this number, typing in say 1 second, 2 seconds, whatever you want. But let's say you had 100 steps. You don't want to have to go through each step and change the time. That would be ridiculous. So instead, you can select a total time and make this, right now they're each 5 seconds, so I'm going to cut it in half, go from 10 to 5, hit enter. Do you want to recalculate on all steps? Yes we do. And now every single step will be increased or decreased proportionally. So if you didn't have them both at 5 seconds and 5 seconds, let's say we had one at...
5 seconds and 2 seconds, it keeps the ratio as you use the total scene time. Cool? We can get into a little bit more. Let's play it back, let's see what it looks like. 2 seconds, 2.5 seconds, it's going to go back, 2.5 seconds. But if you noticed, the lights are not moving smoothly. They're snapping into place. You don't want that. You want to make them nice and smooth. If these were LED park hands right now, the light would be red and green. Red and green, there'd be no fading. So you want to change that. Let me show you how. First, you select the step at which you want to change. Then, you select the channels at which you want to change. So we're going to want to adjust just the tilt really for this one, but you can do both pan and tilt at the same time. So down here you see a little step. If you click it, they become like an escalator or stairs or ramp, whatever you want to call it. This tells you the transition between step 1 and step 2.
If you look, when I click on step two, what happens? It goes back. I'm still in step two, but I have to first change this to make the scene go smoothly both directions. Otherwise it's going to snap one way and then fade back. We want it to fade for both. What if you had a hundred steps? You don't want to do that each time. What do you do? Do it on one step, which number one we've already done. And I meant do it on... Any one, not number one. Select the channels. I just press the control key, which is standard Windows shortcut key. If you're on a Mac, it's standard Mac shortcut keys. I don't know those off the top of my head, I'm sorry. So you'll hold the control key and you'll click on the X and you'll click on the Y and you'll get two check marks. Now what you're going to do is right-click those check marks and you're going to set fade state of selected channels to all steps. When I click this button...
28:45 It just set a fade state for those selected channels for the entire sc
It just set a fade state for those selected channels for the entire scene. Okay? Let's take a look. Supposed to be working. Oh, one's doing it. Oh, you know what? Maybe these are in basic mode. Oh! I'm a dummy. What did I do wrong? You didn't select them all. I didn't select them all. I only selected picture one. Alright, so what do we do? How do we fix this? Right. Highlight all the fixtures, Alan. Sorry? Yep, right now on step one I have to scroll down, hold control for each one. If I started step one with them all fading, step two, three, four and so on would all be fading. Then if you wanted to change it back, you could. Yes, good point. So anything you add after this will be applied to all? That's right, it'll be applied to all. Now let's try this again. Set fade state on all. There we go. Now we'll play it back. There we go. Now we should be working.
32:31 I said pull up your NAMM booth
You can do the same thing with the color. You cannot do the same thing with the color. That's actually going to depend on the fixture itself. Now, most moving heads out there, there's no speed control of the color wheel. Once you send the command to the fixture software, bam, it changes. There's nothing Show Express can do about that. Show Express can, though, send a fade command to that color wheel, but it's up to the fixture to interpret that fade, which most cannot do. It's a lot of money. Good? Alright, let's move on to the next window. I'm going to do it on time. Yeah, we've got to move on to the next window. All right, so let's say you've programmed your entire show.
You've got all of your moving heads programmed, all of your LEDs programmed, literally everything is done, fog machines, strobe lights. You can make a backup of that and right now I have it saved as Seminar 2012. That's just what I named it right as you guys were walking in. I literally typed it in as you were sitting down. What does that mean for you? Well, you don't have to name it Seminar 2012. DJ Expo. So literally, I can select DJ Expo or Mobile Beat from last year, whatever the case may be, or you can select the nightclub that you just installed and they're calling you back because they have a problem. You can recall that on your laptop and it would be as if you never left.
36:06 This is the pitch drum going around
You can fix their scenes, it will restore the fixtures, it will restore all of their scenes, everything as if you never left. You can make a backup of that, put it on a thumb drive and you can even zip it and email it because it's less than a megabyte, which is great. I said pull up your NAMM booth. Pull up my NAMM booth. No problem. So here are the fixtures. This is from NAMM. Then, here's what the editor window looked like. I was on a bigger monitor right now and these all had the individual images but you can see, space them out and select them. And then the live window which we haven't touched on yet here but this is what that window looked like.
And you can do up to eight which we're going to discuss in two seconds.
So when you start getting into the live window, this is what it's going to look like. Completely blank. Page 1 and nothing there. This is now your job to customize it any way you want, depending on your programming. If you want to program quick scenes like you call it fast or call it slow, you can program that way and you will set in your editor window your fixtures to do what you want and when. So you can make the timing nice and slow, you can make the timing nice and fast. You will then import those scenes into this window. So let's actually do something really quick. You know what I just realized? I didn't show you the generator. Alright, you want to make really quick advanced looking scenes, you use our generator. Once you have the fixtures selected, you'll come up here to the generator window and you'll see this. Here you have the list of channels of the fixtures. If you have multiple fixtures selected of different types such as the cue and the intimidator, you will see only the similar channels here. Okay?
So this particular fixture has pen and tilt speed. If that fixture doesn't have it, you will not see that here. This will only be the similar channels. And there's a reason. The reason is this allows you to take different manufacturer's products or even same manufacturer's products, just different models, and make a scene with them to make them all look the same. So here, let me turn on my dimmer and shutter. Right now it is following this dot. I'm creating a circle. All eight of them are doing the exact same movement at the exact same time because there is one dot. This is the pitch drum going around. You can move these red dots anywhere you want and the light will automatically follow that place. You can pick from a selected, I don't even know how many numbers we have here. Make a crazy eight if you want and the light will follow that pattern. Now, you've seen like American Idol shows where they have all the lights kind of beaming around.
39:54 Are we going to pop into that real quick?
Everywhere, they're all not doing the exact same movement. They're doing it randomly as if it appears. Show Express has that capability, those advanced controllers. And here we call it the shift. So what you're going to do right now, the shift is zero. What we're going to do is slide this bar either left or right for negative or positive and it's going to apply a shift or a delay. And you can see now two dots have appeared. The delay right now might not be noticeable by your eyes but as I keep clicking you will see The moving heads slowly start to follow each other. That took me all of 12 seconds. So imagine what it can do for you guys in your rig when you have the same or similar setup with four heads, four scanners, RGB fixtures. It works the exact same way. You can take your red, create a sine wave instantly and your reds will pulse. You can apply a delay and now your reds are chasing all the way around the room. It's the exact same mythology as a moving head. It's just with parking.
So you want that crazy look? You slide it all the way around and now they're all, you know, randomized. What if it's too fast? What if it's too slow? Up here, let's speed it up. Two seconds. Or 20 seconds. It's that simple. Alright? You can also apply color to this if you want to do so. To do that... You simply come in here, click on color, and now this bar is your fader. As you slide it up, it will increase or decrease the values. Just pretend this is a fader from the editor window sliding it up and down. So you wanted to see that example of LEDs or color wheels scrolling? This is how you would do it. Let's see if I turn off the pan and tilt. No, you guys can't see that. So let me do this. There we go. So what I've done there is I just deactivated the pan and tilt.
Since the generator is not touching that channel, and I have them pointing straight up just so that I can show you this color. So as I slide up this color, the colors will change. So I'm going to right click and add a point. And what's going to happen, you see they turn, they change colors. Okay? You apply your shift, okay? All the way down. You can adjust it. Let's say it's not the right colors or something. You can just simply move the bar, get it where you want. And there you go. You can also speed it up or slow it down depending on what you're trying to do. Can you make it sound active to beat? Not from the generator. The generator is more for what you, you know, more precise of what you're looking for. If the fixture itself has sound active mode that's triggerable via DMX, then yes, Show Express can do that. That's really up to the fixture, not Show Express. Alright, so we're going to speed that up again. Everybody understand this concept?
This is a very advanced processor, if you will, for DMX lighting and it's free for you. Enjoy it. What about the 3D mode? Are we going to pop into that real quick? No, we're not going to go through it today. Hey Alan, take a picture that doesn't have sound acting. Is there a setting in there for BPM to tap it out or something? Yes, we'll go over that in a second. Alright, that was the generator which I totally neglected previously. I am going to go back to my previous show. I've got to do this quick. While he's setting that up, just want to remind you we're giving away some lasers at the end of the seminar. Hand in your business cards if you haven't yet and just send them to the end of the aisle and we'll pick it up. Okay, so what I just did there while Carl was talking was switch that folder that I showed you before. So I'm now back to the folder when you walked in, something I've seen that I already had programmed.
44:04 Something that's probably the most important is that app, the wireless
So once you add the light scene, you'll simply right click this bar, give it whatever name you want, add a light scene. It's going to give you the list of all of the available light scenes which I've already selected here and I've imported them. So this could be slow movement, fast movement, this could be just a color wheel, specials, however your mind wants to program, it's up to you. Show Express has the capability of doing it any way you wish. It can be as basic or as advanced as you guys want. A few of the features of this window. One, you can click an unlimited number of scenes and they can run simultaneously. That is extremely powerful. You can also right-click a scene. You can rename it, move it around, remove it, change the color of the button, change the image of the button, change the file which it's going to. We're going to skip that for now. The button speed, the button trigger, so you can set a keyboard trigger, say for your strobe lights.
You want to tap the S button, bam, you hit S, bam, your strobe lights go off. You can easily assign that from that window. Also, if anybody's out there using MIDI control, anybody? MIDI control? Alright, two, three, alright, here they go. You can also have a MIDI trigger to control your light. So if musicians want to have a keyboard doing their thing, you can trigger all of your light scenes from that keyboard by using Show Express. Can you just set that as like a record, tap the button and it sends it? No, you'll... You have to know the MIDI channel and the note, and then Show Express takes it from there. Auto start means once you open live, bam, that scene automatically starts. Flash button means that button must be depressed for the scene to start. When you let go, the scene turns off. That's great for fog machines and strobe lights. Cool? That's how that would work. More options up here. All I did was right click. If you right click this area, it gives you a different menu. If you right click up here, it gives you a different menu. Now you can add a page, which is this bar here.
You can rename it or remove it. You'll add a light scene to it, add a media file such as MP3, WMV, pretty much any media file that's out there. And you can trigger an MP3 from Show Express if you want. You can also sync it with a video. Here is your picture and video timeline. You'll just simply right-click, Add Media, and you can drag it anywhere you want, six seconds in, eight seconds in. Your audio timeline is here, drag your MP3s right there, and then add in your light scenes. And you can slide the light scene around to make it match up with your music so that when you click play, your video plays, your audio plays, and then your lights do what you've programmed to do to that music. You'll then put that into this window by add timeline, and when you click on a single button in live, it will trigger audio, video, and your light cues automatically. Okay, now let's touch on...
Something that's probably the most important is that app, the wireless app. Hold on, I got five minutes left. The wireless app, you're going to select visible and live mobile. Make sure that has the icon there. That gives you the green light. The other thing you have to do is make sure that it's on here, live mobile allowed. Then what you're going to do is whip out your iPads, your Android tablets, your iPhones, your Android phones. Download the live mobile app. It is free. And you can trigger your light scenes from that device. So here, it's connected. When you select it, the lights go on and off based on what I've programmed. So you can be walking around the wedding, walking around any event you want, and you can control, you have full control of every single light in your show wirelessly. All you need is a wireless router. I picked up this D-Link for $29.99 at Best Buy before I left, and it works wonderfully. It comes with a cable.
All you need to know is the IP address of the computer and you're off. It's literally that simple. This is hot, once again it's free, the software is, and it's all included in Show Express. If you wanted to set a scene to go to the beat of the music, which I believe somebody over there asked, the BPM thing, you'll right click, you go to button speed, auto BPM, manual BPM or manual speed. So let's do manual BPM. You see the BPMs up here? Here's your four beat count. You can simply tap on the button. Now it's 86 BPM count and now the lights will move to that beat. This was a lot to go over in a short 40 minute session. I hope I hit it all. If not, you can come to our booth afterwards and I will answer as much as you want. We'll do 10 out of 10 so we can't do questions here but please come down to the boom.
Hi everybody, just to let you guys know we are in the middle of a 4K social sweepstakes where we are giving away $4,000 in lighting gear and all you have to do is enter on our Facebook page, just like us and make sure you fill out the entry form in case you already do. And the winner will receive an iPad that is loaded with Show Express. So it's free, you might as well enter. Another thing we do, we have a DJ blog that we host and on our DJ blog we do DJ profiles so I know a lot of you guys are DJs and if you're interested in being profiled on our site, it's very easy. You can just pick up one of my cards and email me and I'll send you six very short questions Headshot to accompany the profile, and we share it on our social sites, our Twitter, our Facebook, which has like 15,000 followers. So get your name out there. If you're interested in that, please feel free to pick up one of my cards over there. Thank you. Hand up your business cards if you haven't already. Last chance. We're going to give away two lasers. What's the big giveaway? Huh? What's the big giveaway? Which one? The one that's actually on Facebook. That one is in another month, month and a half.
It's not just an iPad, it's $4,000 in life and two iPads.
This transcript was produced automatically from the audio of the video and may contain mistakes.