 8:41
i-Key Audio i-Key Plus, the portable usb recorder.
Contents of the video
0:00 Just give times and dates
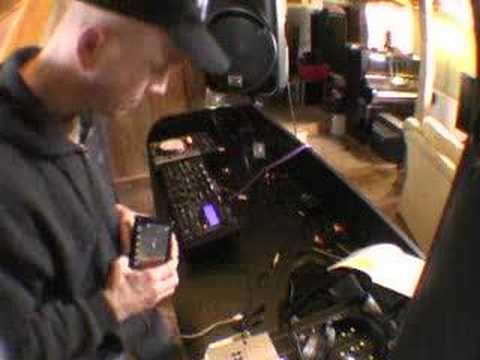
Alright folks, just give times and dates. Today is the 7th of April 2008. If you look to the side of the video, follow the link to the DJTutor.com website, you can possibly win one of these. Still got a couple of days left. So if you're watching this particular video in a month's time from the said date, do apologise, but then just pay attention because you can still see what this particular guy does. Now, okay, what is it? Well, it's not a lunchbox for small people. It's definitely not for putting on the floor and standing on so you can reach the high shelf to get a sweetie jar. And I'm very sorry, ladies, but it's not for putting your makeup in. You'd have a job. But what it is, it's a portable USB recorder. It's known as the iKey Plus. It's from iKey. And it does exactly what it says on the tin. It can enable you to record your set.
It's portable, so you can take that off and you can put some batteries in there. But also it does come with a power supply and there is the input. So I'll show you all these little buttony bits around the side first of all. So that's where you can put your power in. Alternatively, you can take the top off and you can put some batteries in there. On-off, what does that do? Turns it on, turns it off. Hmm, there you go. Right, that there is for your headphones. That there is basically where you can plug in your iPod or your USB. Flash drive, that kind of thing. Now here you have your inputs, RCA or phono inputs that sometimes are known as. Now here we've actually got LN for line, PH for phono, MIC for microphone. So, LN is line. So let's say you're going out of your mixer, you set it to line. Let's say you're actually plugging directly into this an actual vinyl turntable. So what you do, you would set it to PH.
To Fono. Or, let's say, you want to just record yourself. You're walking along and you want to record yourself. Or maybe you want to record a set somewhere. You know, you're in a club and you want to stick it in the corner and record the set. But bearing in mind, make sure you're allowed to do that first. So, what you do, you would set that to MIC and there is a microphone that actually comes with this. I'll pause the camera later and I'll show it to you. Alright, that there is recording level. Now, I'm going to... Basically give you an idea of how to use this, but it is quite self-explanatory. You don't need an actual A-level in rocket science to work it. Because basically what you've got here, if we have a look, these will light up. Now you've got 128, 192, 256, 320 or WAV. What you can actually do, you can set the actual recording level here, first of all 1296.
2:52 Otherwise, if it's too low, the sound is going to be very muffled
If you're recording a live band, And they're playing really quietly and you think, let's bring it up to 0 dB. All of a sudden when they start getting very loud, it's going to start to go over 0 dB. So ideally, you need to set it down here so it will just peak at 0 dB. That is so important. Otherwise, if it's too low, the sound is going to be very muffled. If it's too high, the sound is going to be distorted and atrocious. So make sure it's tapping on the 0 dB. Now earlier on I did say we had 128, 192. Now what we can do, we can actually set this for recording, for the actual quality of recording. In other words, the higher the quality, logically the better the sound. But the higher the quality, the less you'll actually be able to get, the less information you'll be able to get on your flash drive because you'll actually be using more of the storage capacity, should I say. Alright, so what I'll do now...
5:20 You can actually change the plates on the front of it and they're meta
I'll plug it in. I've got this now. This is the cable that comes with it. That's plugged into the actual mixer, so I'm going to put that in there and that in there. So theoretically, if you can hear noises in the background, we've got people jumping on the roof at the moment, don't ask. OK, so I've got that R and L. Now also what I'll do is I will plug in the power there, like so. Now it's still off. I'm going to show you that. That is the microphone. Now, that's got nothing to do with a transmitter or receiver, even though it actually looks like it, but basically you have a microphone there and a microphone there, so it's theoretically for stereo. Also, if you want to be like Flash and Hip. You can actually change the plates on the front of it and they're metal. And also we've got some rather nice sticky knobbly bits, so put it this way, they're quite cool. I mean they probably will get in the way, you know, because they're going to be poking out but if you're on the road and you need to change the batteries and you have not got a Phillips screwdriver then ideally you need to use those. Alright, here's the deal, this is what we need to do first. You've got a button here
On the right hand side with SEL. Now, the reason for that, or one of the reasons, is to set the actual recording quality. So by pressing this we can actually go through 128, if you can see it lighting up there, 192, 256, 320 or WAV which is basically CD quality. So once you've, basically you know which one you want it to record the actual quality to then The actual light will stay on for a few seconds and then it'll turn off. So I've got that at WAV, best quality. There we go, leave it on and bingo, done. Then what we need to do is we need to press record. If I press record you can see the lights shone for a second and the actual light now is shining record. What I'm going to do now is press play. Now you can see there we've got
It's shining up to zero dB. Now, I always think it's a good idea if you're recording on anything and that is to just give it a bit of a demo first. Just try the recording first, see what it's like. You know, in other words, record a tiny bit, take it out and then listen to it first. There's no point with this or anything recording an entire set for an hour and then listening to it and realising there's something wrong because, you know, You're just going to have to do the entire thing again and you'll probably be very annoyed. I would be anyway. So, you can see there it's a zero dB. Now I can actually go from my mixer now to here but I've actually got it from the booth to put down. Right, let's say your set's finished. All you've got to do then is press record again and that's it. It's busy. Alright, sorting it out. So there you go. What I've done is I've plugged that into it. So there you go. Alright, like I said, 7th.
Thank you for watching, and I'll see you next time.
This transcript was produced automatically from the audio of the video and may contain mistakes.