 4:58
Roadready 19" Flight case, Fitting in the SVM-1000
Contents of the video
0:01 This guy here is from a company called Roadready
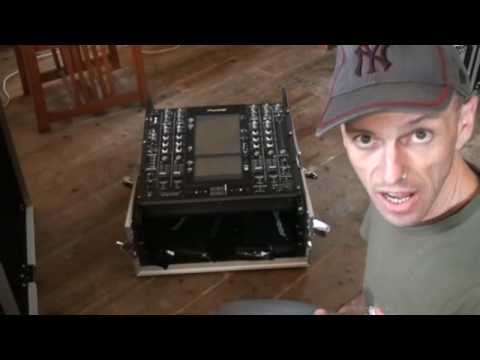
Alright folks, this is a video demo and also it's a bit of information on items called flight cases. Now this guy here is from a company called Roadready. It is a flight case. Now generally people will use flight cases for putting in expensive items so theoretically instead of let's say keeping them in the box, wrapping gaffer tape around it and crossing your fingers and hoping for the best, a flight case If used correctly and if the item is put in the flight case correctly, theoretically the item inside or items inside should last far, far longer. Of course it's down to the end user and how you look after the flight case itself. Now this guy here is known as a 19 inch rack mount flight case. The reason being is because the size inside here to put the items is 19 inches.
1:50 Couple of things
Some DJ mixers and twin CD players and the CD trays are all 19 inch. But let's say you've got an item that's smaller than 19 inches, well you can still theoretically, just so long as you have fixings on the sides of the units, put those particular pieces of kit inside. The reason being is because let's say for example you have a small effects unit that may be this big. You need to ask... There, I've just taken that off to show you a couple of things. The reason that's there is it just makes sure that the unit doesn't wobble at all. But if you have a look there, there's space enough to put let's say an amplifier or let's say the twin CD tray of a 19 inch twin CD player. Alright, so what have we got? Well if I just bring the camera closer to down the bottom there, I'm just going to zoom in. Okay, I'm sure you can notice this guy here.
2:59 I've got one, two, three either side
What you've got is these are movable and you can put those in any of these holes. So basically once you've got your item fitted or should I say once you set your item in and this is where you want it to go, then you put one of these behind here and then this guy here would fit into there and then you screw it in. I'm just going to bring the camera back out. Oh, wrong way. Alright, let's put it to about there. Right, that's pretty cool. Okay, let's have a look. I've got one, two, three either side. Now I could have four if I wanted to because there's another hole. Alright, now again, very, very small point but very relevant. What you need to do first before you put not this part, the other side in the flight case, what you need to do is just get your piece of kit
And just put it, position it where you want it to be in the flight case. Then what you need to do, you can get a little piece of paper or a marker or something like that and just mark off to the side here where the holes are. The reason being is because then you take the item out, I'll just pan back out again now, wrong way. You take the item out and then you know exactly where to put the bolts, like so. So I put a bolt there, one, two, three. And the same on the other side. And then of course you put your piece of kit back in. This is quite important as well. Once you put your piece of kit in, these guys, what you need to do is just screw them in a little bit to begin with. Do all of them. Don't put one in, screw it tight, the next one screw it tight, the next one screw it tight. Because what you may find is the other side will be slightly out of position. So you need to screw them in so they're secure but not tight.
And then once you've done all of them, then screw them in tightly into position. Now this guy here is, I'm not exactly sure how many units this is but you could let's say put an effects unit with this and also maybe a twin CD player or something like that. Now I'll put a link in the description that will take you directly to the RoadReady site where you'll get more information on this. It's roadreadycases.com. Practice and enjoy. Thank you.
This transcript was produced automatically from the audio of the video and may contain mistakes.