 7:59
Technics SL1200 reverse at last! timetec off youtube
Contents of the video
0:00 Technics SL1200 Mark II
Alright guys, Technics SL1200 Mark II. So what has that got to do with that? Let me explain. Right, first off we need to get underneath the platter. So important, make sure the turntable is unplugged from your mixer and the mains do not have this plugged in. Right, take my slip mat off. Now occasionally the platters can be a bit sticky and it's sometimes difficult to get them up. Now, alright, you shouldn't normally use something like this but tap it gently on there and there you go. Right, now I've got to start undoing these screws. Ah, now you need to use a Jones screwdriver. Pardon? What? Phillips! Phillips! There you go. It's one with the crossy pointy bit at the end. Okay, taking all the screwy bits out. Now then, just a bit of a tip for you. How many times have you lost your screw? I mean, there's nothing worse, is there? So, leave them in, lift that up like that. They're quite happy there and just put that somewhere like in the oven or something. Just kidding, just put it out of the way, alright? Now then, that is your circuit board. And that is a little bit of what was known as destructions.
3:37 It has to be fitted to the fifth leg along here
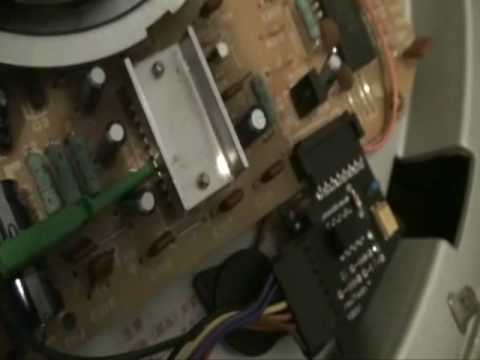
Most people call it instructions. Right, that guy will basically fit there. Okay, just be a little bit careful but you need to sort of gently tease this out. Okay, you'll notice the way that is pointing and that fits there. I believe that's a tiny little speaker that will go bleep. Notice the purple wire. It has to be fitted to the fifth leg along here. So I'm going to do that now and how you fit it is a bit like squirting someone in the face with a syringe, like that. You pull that down, you've got the two tiny little legs that poke out, wrap that around the heat sink, let go and then give it a little bit of a tug to make sure it's secure and just check.
So I'll do that now. Okay, there we go. Now with my pointy bit of paper, I'm going to just demonstrate. So if we look here, we have one, two, three, four, five on the fifth one and also at this point you want to make sure that everything is secure. Just check to make sure that is secure here. Here, here, here, here and here. Over here and there. Well, just use your head really, innit? Right, now at this point you could sort of climb on the roof, I don't know, go for a walk, maybe go to the toilet or maybe even just, I don't know, just stand on one leg. But ideally at this point you need to put that back on there. Sorry, actually just a quick point here at this particular point, point, point. What you could do...
5:08 It's quite often turntables will get a lot of dust around this area he
It's quite often turntables will get a lot of dust around this area here. So, bit of a tissue and you could just wipe that. Now, you only need to have the tissue damp or a cloth and you will find if you haven't opened your deck up for a long time Look at that. That's bad. So it's a good idea just to do that while the black area is off. What's it called? It's the black sort of I hope you like my terminology because it sucks. Right now again, this is a learning curve for me. I just tried to put that on and it wouldn't fit. You know why? Because that was going over here and of course that was too high so I couldn't put the black roundy bit on. So what I had to do was put it across sideways like...
And again, check, make sure the small tiny little prongs aren't touching any of the other legs. So I'm going to pull that out like that, put that back on there and cross my fingers. There you go, sorted. Right, I'll screw that back in. There you go, sorted. Right, here we go. Well, basically, I can now put this turntable into reverse mode. Now, by default, when it's turned on... It'll go forward. Check this out though, if I press start-stop for one second, there you go, backwards, 45, now that is very, very clever. Okay so there you go, right, if you want any more information on this, I will as ever put a lickable link in the description, mainly to the email address. And also I'll put a YouTube account where you can, you know, hook up with the guys and see what you think really. Practice and enjoy. Practice. That's what it takes. And enjoy. Thank you.
This transcript was produced automatically from the audio of the video and may contain mistakes.