 9:33
Making a flight case for your gear
On YouTube this video is called How to make a Flight case for your DJ gear.
What this lesson teaches
Ten minutes of woodwork, and it contains an idea good enough to justify the whole lesson.
Why you want one
A flight case is a box for expensive equipment. The scenario he describes is the real one: at the end of the night everything goes in the back of the van, something falls on your turntable, and you have a bent tone arm or a scratched jog wheel.
Proper cases are expensive. His answer: make one.
And he is honest about his own - homemade, a bit rough, very dodgy, didn't cost much, and it works.
The trick
This is the part to remember.
Most people try to build a base and a lid as two separate boxes - and then they do not quite fit each other, because two boxes made separately never do.
Instead: build one complete sealed box. Top, bottom, four sides, all screwed together, with no way in.
Then cut it. Across the middle for a deep case, nearer the top for a shallow lid, wherever suits what is going inside.
Because the two halves were one box, the lid matches the base exactly - every side, every corner, automatically. The fit is a consequence of the construction rather than something you had to achieve.
That is a genuinely elegant solution and it is how real cases are made.
Construction
Plywood, screws, glue, a tape measure and some time.
On assembling the sides, he makes a point about screw direction: two panels can meet with the screws going in either of two ways, and either works - but on its own, a four-sided frame is flimsy.
What makes it rigid is the top panel, screwed down into all four sides at once. That ties the whole thing together and turns four loose walls into a box.
For larger cases, add metal corner braces inside - two per corner, one top, one bottom.
The corners
Outside, fit stacking corner pieces. Plastic ones exist; his are metal, and metal is what you find on turntable cases because it lasts.
Without them, the corners of a plywood case are destroyed within a season. They are the part that hits everything.
Hinges and catches
Simple clips to hold the lid closed, and - the detail worth copying - hinges that hook on and off rather than fixed door hinges, so the lid can be lifted away completely instead of hanging off the back while you work.
The padding, and the reason for it
His most important practical point.
If the item is ten inches by ten inches, do not build a ten-by-ten interior. It will only just squeeze in, and it will be scratched going in and out.
Leave a gap all round - sides, and top and bottom - and fill it with foam.
Two reasons, and the second is the one people miss:
Fit. Equipment goes in and comes out without rubbing.
Impact. If the case hits something, equipment pressed against the inside of the wall takes the blow directly. With foam between, the foam absorbs it.
That is the entire purpose of a flight case. A rigid box with no padding transmits every knock straight to the contents - it protects against things falling on the case and does nothing about the case itself being dropped.
And a partition
His case has an internal divider, which does two jobs: it separates the items, and it stiffens the box.
Free rigidity from a piece of ply you were going to cut anyway.
Contents of the video
0:00 A few people have asked me about flight cases

Alright folks, Jonathan here. Now a few people have asked me about flight cases. Now first of all, what is a flight case? Well, basically it's a box that you'll put your expensive kit in. And the whole idea of a flight case is, let's be honest, you've got a very expensive turntable or a CD player and the cat's playing with the tripod. The last thing you want to do is just stop it. The last thing you want to do is, you know, at the end of the night, you're chucking in the back of the car or the van and all of a sudden something falls on the top of your turntable and you've got a knackered arm or maybe the jog wheel, there's something on it and it's scratched. You don't want that to happen. So, of course, what do you do? You want to buy a flight case but, of course, they're expensive. Well, why don't you make your own? Now, here you go. That is a flight case. In there I've got four lights and I made that myself.
It's not the best flight case in the world, and it looks a bit rough, but it does the job. Right, here you go. Here's my flight case. Homemade, very dodgy, but didn't cost much at all. And at the end of the day, it works. Now, right, what you can see is you can see the top piece is covering all the side bits. Now, if I pause the camera and we'll take a closer look, you'll see exactly what I mean. The top piece covers all of the side sections, which is quite important. What I will do as well is at the end of this video I'll give you not so much a diagram as in the exact sizes but I'll give you an idea of how you can construct one of these. Right now then, here's the deal, hold on let me just pause it again. Now a lot of people actually think that again yeah alright logically with a flight case you've got to have a bottom and a top because at the end of it there's no point having a box.
2:27 You can even cut it in half, it doesn't matter

If you make a box, you can't put anything in it. But a lot of people think that you have to make the bottom and the top, and there's a lot of messing around. Now, whether you do or don't know this, but I've got a tip for you. Brilliant idea, quite logical and fantastic concept. And that is, make a box, okay? Make a top, bottom, four sides, put them all together so you have a complete box. And then you're thinking, right, well, how on earth are you going to get inside it? A top and a bottom separately, then there's a possibility of them not fitting together. If you make a complete total nutter box and then you can cut your top however high or low you want it. You can even cut it in half, it doesn't matter. Then you know you've got an exact matching top and bottom. There's just a tip for you, okay? And also you'll notice on this one here we've got these corner pieces, right? Now again, at the end of the day
Your corners are going to get completely knackered if you haven't got something on there. Now, again, you can get plastic corners that stack. You can get metal corners that stack. These guys are metal and you find these on a lot of turntable flight cases. Ideally, you need these. When I say need these, ideally metal ones because they will last a lot longer. Right, let's take a look inside of this thing now. Right, now, I don't know if you can see there, but I've got just some relatively simple clips there. That basically just holds it in place, if you can see, just there. So of course, open it. Now, if you think about it now, okay, of course you've got to have hinges on the back, haven't you? Now, some flight cases, you can have these sort of like, sometimes they're called butterfly clips. You can have them either side. But I've just got hinges on the back there. But of course, if you get normal hinges that you find on a door, trouble is then, you know, that's going to always be stuck on.
And you don't really want that. So what I've done, I've got these hinges that basically, you can see, if you can see that, you've just got almost like, it's not so much a clip, but they just hook, oh there you go, you can see it now, they just hook onto the back of the actual flight case. Right, I've got four lights in here, these are four MAD scans. Now, I don't know if you can see, I've got a bit of foam in there, because logically at the end of the day, you know, in the back of the van or the car, You know, they're going to be jumping about all over the place. But one important fact, and that is this. Let's say your item that you want to make a flight case for is, say, I don't know, 10 inches by 10 inches. Well, the last thing you want to do is make a box where the inside dimensions are 10 inches by 10 inches, OK? Because that item you're going to put in there is only just about going to squeeze inside and it's going to be scratched. So, you need to have some gap.
Around the edges okay that is very important okay two reasons one and that is if you think about it now if let's say you're an accident and this flight case hit something and your item was right against the side here well you're going to have an impact straight on your piece of kit now with a bit of sponge of course you've got a bit of leeway there and this sponge will take some of the impact so ideally make sure you've got a nice good gap around the item you're going to put in there And also, top and bottom as well, not just the sides. And also you can see here, I've got a partition there as well, alright? You know, at the end of the day, it's all security, and this particular partition here makes the box a little bit more sturdy as well. Right, what we'll do now, pause the camera, I'm going to show you a couple of diagrams, they're not going to be to scale or anything like that, they'll just give you the basic sort of idea of construction. Okay, hold tight.
6:20 Very quickly as well, that is relatively flimsy
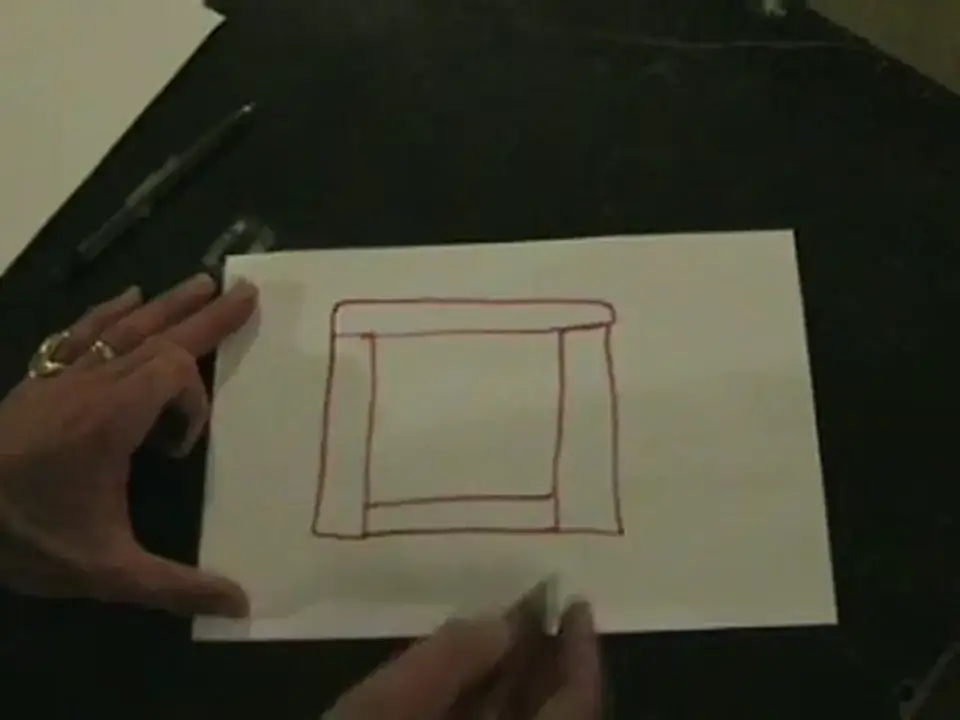
Alright, the actual easiest way of construction is relatively simple if you can understand the concept. Now, if you imagine I'm going to construct the sides. So there's one side like so and there is the other side like so. Now then, the other pieces can fit two ways. They can either fit like that or they can fit like that. Now the reason being is if they were fitted like that, you would have a screw and you would screw that screw in that direction and a screw that direction like that. Alternatively, if they're fitted that way, then you'd have a screw fitting in that way and a screw fitting in that way. Now very quickly as well, that is relatively flimsy. Okay, but here's the deal. Now then, if you can imagine now, right, just forget all of that there.
If you can imagine now, we're looking at that size. If then I have a top piece and that top piece fits exactly on there like that and then I screw down into those pieces, theoretically that top piece is going to fit all that together and make it really strong. Now also if you need to make a huge flight case and you still think It needs to be slightly stronger. Now, well you can't really see that there, but what you can get, you can get these metal corner braces and they're basically shaped like this. Shaped like that and then they've got small screw holes. So, if you can imagine that there, all you need to do is fit say two in each corner, one at the top, one at the bottom. So one of those corner braces will go there, one there, and one there.
On one there. At the top and at the bottom. And then like I said, alright? Right, there we go. Now let's say all of a sudden, let's make our box like this. Bit of a cube. Is that about right? That's about right. So there's our box. Now what we can do now is you could cut that box like this, across there, and then you've got your top and your bottom. But also what you can do as well, if I can do this, hold on, let's have a look. I do really need another piece of paper. Hold tight, let's get some more paper. Right, this might be hopefully a little bit easier so you can see. Let's have a look. Across there and across there like that. And then of course logically on the other side you'd be cutting like that and then like that. So there you go. So you've made your box and then you can cut it accordingly. And again, you know, something like that for lights, for maybe an amplifier and then something like this.
Turn table, vinyl turn table, CD player. And again, what have you got to do? Just cut it. Cut it around across there like so. I mean that's basically it really. It is relatively simple to do. All you need is some screws, some corner pieces, some plywood, some glue and a bit of know-how and a bit of time and a tape measure. Now I hope this has been a help. If you want any more information... Thanks for watching, practice and enjoy.
This transcript was produced automatically from the audio of the video and may contain mistakes.