 31:09
Laserworld Showeditor Professional Laser Software Demonstration Set Up
Contents of the video
0:00 Back of the hardware you can
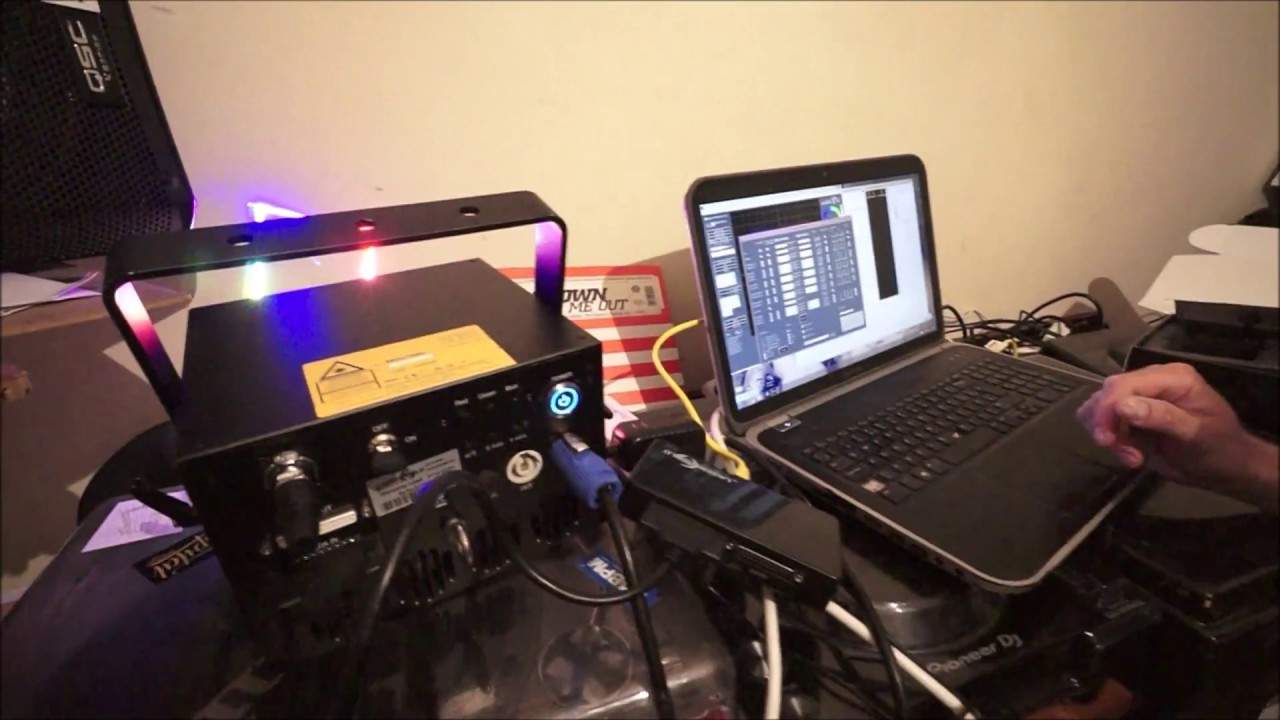
Right guys, I'm here with Norbert from LaserWorld and we're just setting up the show editor. Got the LaserWorld Tarm 2, we have the show editor hardware and we're just downloading at the moment the latest version of the software. Alright, the software's been installed very quickly as well. If we have a look at the back of the hardware you can see we are on dip switch. Just remind me, down is on, correct? Down is on, yeah. Yeah, down is on, up is off. So we've set the dip switch number 6 to the on position and the rest of them are off. Which is actually the auto IP setting. It automatically determines the IP settings so it's easy to go and you don't need to set anything at the computer. Great, fantastic.
Usually. So basically we have the four different elements of the software, the figure editor, the live show, the timeline show and the playlist feature. Where in the figure editor you can create your own artwork, you can create your own patterns and animations. In the live show you can call them during live operation of the laser show and the timeline show you can create your own timeline shows which are synchronized to music or to video. And with a playlist you can recall timeline shows, ready build timeline shows in kind of a playlist structure which eases things for making wedding laser shows or some kind of that. Cool. So let's head for the figure editor, this is the core element of the software.
1:37 How this works I hit new
Here's the figure editor, here's the figure table. So first of all, here we can create our own figures and animations and to just show you how this works I hit new figure, get a shape, draw the shape and hit laser on. What we can see now here is the laser on, we just reduced the colors so it should not be damaged. It's not that bright for this small room here because this is a Tom 2, it's a super strong unit but this is just to show you. It looks a bit flickering. Actually that is, I'm going to turn it down even more actually. Yeah. There, I think that's quite adequate. Yeah, that's just blue now. But actually yeah, we need the colors so we need to have a balanced output basically something like that.
We'll see that later. It looks like, yeah it's a bit flickering now. This is due to the standard setting is only 10k pps which is the scan rate so we hit options and we get another window with all the different options we can set. There is plenty, plenty, plenty of options so if you have any questions regarding how to set the scanning, how to set all these parameters go to the website showeditor.com and have a look how you can do adaptions and optimizations here. Yeah. For now I just increase the scan speed. I go up here. I go up to let's say, for here for the testing purposes I go up to 25 to 30. Now it says oh watch out it's very quick. Scanning is very quick. No don't want to see this message again.
Yeah that flickering has gone completely now. Flickering has gone completely. That is just a perfect square. Yeah. So I'll leave it here with 27k. Is that going to, very quickly, is that going to shorten the life of the motors by speeding them up? If you overdo, yes. So you should stick to the specifications given by the manufacturer usually with laser but there are reasons to overdo it sometimes but it all depends on the scan angle so the smaller the scan angle the higher you can really speed the scanners. That's it. But the bigger the actual image, Yeah. the slower it should be because otherwise it's got to move quite a bit. Yeah you will see that basically when you do test pattern, a very large pattern you will see that it will not look like it should and it will look distorted and if it looks distorted you need to do adaptions.
How to do these adaptions this is all on the website so this is pretty detailed to talk about but just for the operation of the software there is two options to close this window. If you want to preserve the options just for this session and if you don't want to have them preserved when you restart the software next time then you just hit close window. If you want to preserve the settings in the whole configuration of the software, Forever. Forever then hit save settings and close windows. Right so there just for today and there if you want to save it all the time. Yeah so we want to save them all the time because we just want to start up the software and get going. Yep. So these are the settings there.
5:11 Intensity of the laser there so
We need to on the laser again, here's the laser. There is more settings especially in terms of laser safety which is important. Here we have in color correction we have the option to do safety zones so we can draw. That's what I was going to ask yep that is important isn't it because again you don't want to scan the crowd. And again I presume that if you go back you can set intensity. So intensity of the laser there so. Yeah it is like that if you can see that we have I've drawn half of them basically half of the projection I've drawn. Just see there it's a lot bluer. You can reduce that here and you see that there's due to us having very, very low power now we reduced the power here at the unit. You just see that the color changing a bit when reducing.
Yeah. Power but what you can see now we just have a small a little remaining. Yeah. What would you say for example this is Tarm 2 it's a minimum of two watts so what would you say would be a good scanning percentage letting you scan the crowd? So with two watts would you go down to for example 20%, 10%, 15, 30? It all depends on many aspects. It depends on the scan rate, on the actual pattern you're doing. Yeah. So if you make three beams or hot beams or whatever then of course you need to reduce power much, much more than if you just do some Mickey Mouse or whatever power projection. Got you. And it's also depending on the scan speed so if you have high scan speed then it's less dangerous than with low scan speed.
Yeah that does make perfect sense yeah sure. Also haze and fog in the air just makes a difference. So yeah it all depends basically. Okay. But this is just the feature where you can do the adjustments and you can also set another safety zone for example if there's a camera somewhere you don't want to hit then you can just black out the laser at this position. So there's a lot of more things you can do here in the general color correction settings, you can set the maximum power per color for example here. You can even adjust the color curves. You see the color curve, it depends on the intensity how the behavior of the laser sources inside the unit should work. So there's a lot of things you can actually set.
7:57 We just have one so this is something to look at later
You can set the threshold for the diode so you have different color behavior curves here. You normally don't need that for the beginning so yeah it's just something you should know that it's here basically. Yeah if you have more than one hardware interface you can select it here. We just have one so this is something to look at later. And here you can adjust the size of the projection, now we're running at 55%. So if I get up here we do 100% which is way much larger and you can see the scan angle is really large on the Tom 2 so this is just 65% which is okay. And you can do XY mirroring and all that stuff whatever you need if you don't want to do it at the unit you can do it here. This is where we've been already.
And there's many more settings like how the software should behave during timeline show and how the whole features of the software should work actually. Just leaving that one here. Here's the MIDI and DMX settings which are very important to do for live show because in most cases if you run a live show you want to have some proper faders to control intensity and speed and something like that. And this is what you can do with MIDI. Or DMX depending on what you want to do. And here's the settings, the general settings and the specific settings can be done in the live window then later. Okay so let's hit save settings and close window. We save what we just set there. Oh did I still have the... No I don't have the safety zones anymore it's all fine and good.
10:22 We'll create a new folder and call it AAA
So we're here with a creation window doing own shows. At least we do own frames, own figures, animations. What's most important is to you know make a new folder here. Because if we work in the existing folders it may happen that existing files in these folders have certain permissions on the files which can result in if you put own figures in there you cannot share them later. Or you probably cannot open them anymore. Because the settings on the existing files apply to the new files as well. So what we do is we create a new folder. Where is it? There it is. We'll create a new folder and call it AAA. So to recall it we just go here. Call the folder. You see it. Why folders? Folders are essential for laser world show editor cause all the frames, animations, sound files, media files, show files everything is saved to this folder.
Right. So if you want to share a show with somebody else you just copy the very folder and everything's in there. This is very important to understand cause other software uses other methods to do that. Sometimes it's rather difficult cause then the files can you know get apart. And the frames and animations used in a show are not with the very show together. So you cannot simply share the show and this is different here. So it's rather easy for us to do this. If you open a folder here you already see all the frames and animations that are within this folder in the frame and figure table which is here. Now it's empty cause we don't have one. So first of all we just do a basic figure which is a square.
White square. And we do some colours to the points. So there's the colour tool. This is the colour tool. We left click on the colour tool and we select for example red. And left click here. Then we select yellow. We click here. Green. We click here. And blue we click here. Very simple. So it's rather simple. This is our first figure animation. This would be, if you look towards it through smoke and haze, this would be kind of a tunnel effect with visible points in the corners. It's not a round tunnel but it's just a square. But it's quite nice to use for live shows. It's very easily usable. So what we do is we save that figure. And I just... We're in the right folder. You see that one? We're in this folder. I just save it.
It's square 1. So we have square 1 and it's already here. You see it here? If we call it, this is square 1. Got you. So what we want to do now is we want to animate square 1. Very important to understand like with many other software programs. We showed that there is left and right mouse click have different features. So if we use right mouse click on some of the features here we get different effects. So what we do now is we want to do a new frame. Because this is all frame based. All animations are frame based like with video editing where you have all the frames. This is it. So first frame is here. We can see we're on first frame. Now I right click new frame.
13:19 Because I right clicked
And we have a second frame which is exactly the same as the first one because I right clicked it. If I click left then it's just a blank new frame. But I want to reuse the points that we have now. Because it's important if we later want to apply a morph effect, we need to stick to the exact same points. Because otherwise if we don't use the same points, it's tricky for the computer to determine which point should morph to the next point. They cannot be matched by the software because it's simply not possible. So if we use the exactly same frame, it's clear which point here is point 1 and which is point 2. So what we want to do now is short animation. We click on the hand tool here. Left click. We're now on...
We go to frame 2. So this is frame 1, this is frame 2. We see it here. Frame count down here. We see the frame count. So we're on frame 2. I drag. I right click and drag this point to that position.
I do the same here. Everything with right mouse click. No, sorry. It's my fault because this is now marked so I took the wrong one. I left mouse click mark it and there we go. So what we have now is two frames. One is large. One is small. What we want to do now is put a morph effect to those. To do that, I save this frame as square 1 animated. So see, this one is square 1 animated. Square 1. Square 1 animated. So what we do now, we have two frames and we say just morph all. We do morph all. We'll probably... How many frames we want to morph? We do 250. So what's happening now is it inserts 250 frames between frame 1 and frame 2 just morphing it from one to the other. So I can just flick a big small... No. What you will see now, we do...
15:59 Just hitting the other option here
We want to have this animated and see what's actually happening. So we enter frames per second and this one should be let's say 50 frames per second. Okay? Look what's happening. Right. Got you. So we got the animation going and if we're at the size off it starts again. If you want to have it zoom in and zoom out, we just do it alternating. Just hitting the other option here. Alternating and then it goes large and small. That's it basically. So we save this as another animation. So we have static one, the one with the two frames only and the animated one. Now we want to go one step further. We want to have smooth color on those. So not only some colored lines but smooth color which is pretty easy to do. So we go here and there is on edit, there is insert color gradient.
So you put an insert color gradient in and distance for soft color I say... It's okay. We leave it 500. Let's see. Now it asks me if it should be added to all frames or not. There is kind of a translation bug still so it's not translated yet but it says if it's all... To all frames or not and I say yes. So as we're not on full power it's rather tricky to see. That is so bright though. Pushing up the power a bit so the diodes can modulate properly. What you can see now is there is color transitions. So it's not just flat points or flat lines but it's color transitions and this is pretty cool because this can be applied to different color effects in one thing and good one. So this is the fading one. We can now apply different effects directly to this frame or this animation.
18:07 Effects, we have the option
This is what we can later call from the live window as well so I try to do it here. If we go to effects, we have the option to put on a rotation effect. Look it's rotating now. It's crazy isn't it? It's something simple. It's just a square. It's just a square. Yeah. But the effect is super cool if you have this effect with haze and fog. Oh yeah. You know just for beam show effects. It's crazy and it's so simple to do. And also as well, if you do have that sort of... That safety zone, you're always going to get that safety area. Yeah. At the precise point. I see it's twisting as well. Yeah very good. So you can add further effects. You need to be careful how you do it because this what's now happening. It's pretty...
You saw that? It switched off because it's focusing. What I did now is a compression on X and Y axis and it zooms to the very point which is not acceptable due to safety reasons, buff, and it switches off because there's a scan safety built in. Got you. But usually this is what we shouldn't do so there's a lot of responsibility for the show program as well. Yeah sure. You can also do several nice effects on the... On the color and what not. So there's many, many options here but I'd like to not do any effects now because I want to use the effects later from the live window where we can call all the effects by DMX or by MIDI so if you have kind of a static figure like we have now, you can just stop the animation.
Yeah. And then you can have it slightly moving in. You know, if the music comes in you have it slightly moving and then you let it start turn. And this can all happen within the live window so you don't need to prepare it with animation. You definitely need to prepare it with animation. If you need the animation just as standard effect for example for the timeline programming then you can just save it with this animation thing but I don't want to do that. I just want to add some new animation, new figures. For example, I want to have an effect where I have a tunnel. With these kind of, you know, visible lines in it. So it's not only a circle but it's with visible points in it which is rather nice because
20:47 It's called a polygon tool
You can let it turn then and you see the turn effect. And you see, yeah, I got you. Yeah. So what we can use for this is this tool. It's called a polygon tool. As standard it has six corners but if we right click on it, it lets us allow to, you know, add more corners. So I do let's say 30 and if we now left click it, now it says overlapping edges. This is okay just select it. What you can see now is that there is these points. Yeah. I just want to recolor it to be white. I'm just going to turn it down a little bit because it is actually really bright. Yeah. I'm not the sort of person who likes to turn things down or off anything but that because I think it's because it's so powerful. It's so powerful. Yeah. I just, I just recolor it to white because now the last color was blue so it was drawn
In blue. Yeah. I take the hand tool, left click it. Yeah. And I just select it so every point is selected. Yeah. And then I select a different color and I select the color change tool. Now it's white. Yeah. Okay. Because we turned down the color. Yeah, I turned it down. We need to recolor it properly. Yeah. Something like that. Mm-hmm. So here we go. So if you see that in the fork, you will see the lines as well. Not only the circular effect but also the dots. The lines as well. The dots. Yeah. I got you. Amazing. So it's not just a normal animation. Yeah. That's sweet. So this is what we... I saved that one as circle, dot circle so we can use it for the live show later. Do another new figure. For example, putting lines. There is one important things to know about lasers.
23:20 Again, it's probably because it's so bright but yeah
Lasers are drawn in... It's one point that it's basically drawn. So if you want to have blanks in between lines or something, you need to blank them proactively. Right. Otherwise, it will draw and continue drawing. Yeah. I agree with you. Yeah. Like with a pen. So if we want to have different lines, I just can put... Yeah. Yeah. Yeah. Yeah. Yeah. So I can put... Start the line here. Yep. And then I right click and this adds a blank point. Right. Standard with this line tool, it standard adds another blank point but I do it proactively. So I right click, there's a blank point. Then I start again and right click, another blank point. So if you can't see on the video where my finger is, that actually is a blank point and there as well and there.
Again, it's probably because it's so bright but yeah. Got you. Cool. So this is just... Because again, this is great for wording, isn't it? Instead of having all of the words joined together. Yeah. Separate words. If you do text, this one I'll show you later. It will probably do text anyway. It will automatically do that. So there are some automatic features in this so not everything needs to be done manually. Let me just recolor some points. And now we do the same thing. We do the color gradient and I put in some color gradient. You cannot see it properly because it's too low in power but there is a color gradient now. Yeah, you sort of go to blue and then to white. Yeah, yeah, yeah. Nice. So this is just enough for us now because what we want to do is we want to use that for live show.
So what we do now is we switch... Switch to the live window. Ah, by the way, we did all these animations here and they're of course already saved. So if we look to the folder, this is all saved here so we don't need to save anything like a workspace or something like that anymore because this is all in this folder already. Right. So we could already use these animations and figures for other shows. So just copying it and pasting it. So we go to the live window. This is the live window. It's like the normal keyboard on your computer. And it's rather easy to assign these animations to the three keys. So let's do it. I just drag and drop it here, drag and drop it here. Oh sorry, missed it. And this one and this one.
25:58 In most cases this is sufficient but there's the option to do that
Okay? Mm-hmm. So if I press the buttons 1, 2, 3, 4, I can just recall what I just assigned to these keys. You can also select the different banks. There is F1, F2. You can select the different ones but you don't need it normally. In most cases this is sufficient but there's the option to do that. Yeah. If you're in live mode, you can adjust for example the master brightness. You see that? Yeah. The brightness adjusting. You can also adjust the animation speed. So there's the animation happening. Mm-hmm. You can reduce the speed of the animation which is pretty cool. Okay. Because you can then just stop it. Mm-hmm. Blank it out and then you can, you know, fade it in. The music's starting getting in, you know, kind of an intro.
Yeah. And then you can speed up, slowly speed up the animation. Yeah. And then put on rotation. Nice. Really fast rotation possible, other direction. And this is what I usually if I do live, this one, this is what I use either with the MIDI control or with DMX. Yeah. So you can assign these ones here to MIDI or DMX which is rather simple. You tell DMX which DMX start value do you want to have and which stop value do you want to have, and that's it. So from one to eight on the DMX channel which is assigned in the options. Mm-hmm. So you can assign which channel you want to have and this is the value you're giving the individual animations. Cool. And the same is with MIDI. So you just tell the MIDI mapping which channel actually should call this animation.
Okay, so like sort of a MIDI keyboard or anything like that? Exactly. You can assign this to pretty much every MIDI keyboard you have or pretty much every DMX controller. Yeah. So this is just a rather simple mapping and all the other features can be set in the options. So assigning these sliders can be done in the options as well. Okay. You can have more than these sliders here so as you can see there's many, many more effects but you can use all these effects with DMX or MIDI at the same time. So not only the ones shown here but many more if you use an external controller. Okay. All right. Let's cut this now because I don't want this video to go on for too long but again this is the Laser World show editor.
28:31 Get the software and it'll do it for you
How can people get a hold of this? Yeah. Basically there's a lot of bundles out there where the retail stores they're offering them in bundles. So with Term 2 or with the new Diode Series units and it's a rather affordable system and it's all with LAN connection so it's no USB anymore, it's a modern way of laser control. Okay. That's it. I think the analogy is a little bit like someone buying for example the Pioneer XDJ-RX2 and just using MP3s but if you use the Rekordbox software it comes to life. So if you're going to get a decent laser, spend a great deal of money. You know you don't really want it doing sound-to-light, you want it to do a correct show. Get the software and it'll do it for you. And there's the option to have the software do sound-to-light as well so there is an option
With sound-to-light and of course there is preset animations with it so I showed you the hard way. There's an easy way. You just hit load live show and you go to the program files. Search laser well show editor. I'm not sure which one it is because there's the only one installed as well. This one here and there is, where is it? Default live show. Hit default live show and it loads the default live show with all the preset animations and figures so it's just ready to go. Yeah wow great. Just take some time because it's a lot of files. Yeah yeah alright. Okay there you go. So we're on pre-live so there you go actually QWERTY keyboard. Some preset animations here. You just can press the normal keyboard, you can assign these patterns to DMX controller
Or MIDI controller whatever you like. It's very simple and these are the presets already and you can play with the presets or there's more presets you see that? Yeah. Many many more presets, animations and you can add your own files of course. Computer's stuck. See you've knackered my computer. Yeah. There they go. We just click here, the keys are... Yeah I think that some of the keys are a bit dodgy as you can see. This computer is actually, I can't complain it's about four years old it's still sort of working just. Alright Norbert it's been amazing thank you very much indeed and yeah now I've got these Tarm too. I need to definitely look at using the show editor, definitely it's going to bring these to life.
Fantastic so well thank you very much don't forget check out the link in the description there'll be a couple there'll be one to LaserWorld and also a separate link to the actual software the show editor software so thank you very much practice and enjoy. Nice one.
This transcript was produced automatically from the audio of the video and may contain mistakes.